The Hydraulitechs Honing Machine is a precision tool designed to refine the internal surface finish, geometric accuracy (e.g., roundness, straightness), and dimensional consistency of cylindrical tubes—critical for applications like hydraulic cylinder barrels, automotive sleeves, and industrial piping. Mastering its operation ensures optimal performance, extended tool life, and compliance with strict industry tolerances (e.g., ISO 4413 for hydraulic components). This guide outlines a step-by-step workflow, from pre-operation preparation to post-process maintenance, tailored to both novice operators and experienced technicians.
1. Understand Core Components & Purpose
Before operation, familiarize yourself with the machine’s key parts and their functions—this foundational knowledge prevents errors and streamlines troubleshooting:
| Component | Primary Function |
|---------------------|----------------------------------------------------------------------------------|
| Honing Head | The rotating assembly that holds honing stones; adjusts radially to apply pressure to the tube’s inner wall. |
| Honing Stones | Abrasive media (e.g., aluminum oxide, silicon carbide) that removes material; grit size (e.g., 120 for roughing, 400 for finishing) determines surface finish. |
| Control Panel | Digital interface to set parameters: spindle speed (RPM), stroke rate (cycles/min), honing pressure (PSI), and process duration. |
| Coolant System | Delivers specialized honing fluid (oil- or water-based) to: 1) Lubricate stones/tube to reduce friction; 2) Cool the cutting zone; 3) Flush away metal chips to prevent surface scratching. |
| Workholding Fixture | Secures the tube during honing; may include chucks, V-blocks, or pneumatic clamps to ensure alignment with the honing head. |
| Stroke Mechanism| Moves the honing head axially (back-and-forth) inside the tube to ensure uniform material removal across the entire bore length. |
2. Pre-Operation Preparation: Safety & Setup
Safety and proper setup are non-negotiable—they prevent equipment damage, operator injury, and substandard results. Follow these steps *before* powering on the machine:
Step 1: Adhere to Safety Protocols
- Personal Protective Equipment (PPE): Mandatory gear includes:
- Safety glasses or a face shield (to block flying chips/coolant).
- Nitrile gloves (resistant to honing fluid and abrasives).
- Ear protection (if spindle speed exceeds 1,000 RPM, as noise levels may exceed 85 dB).
- Steel-toe boots (to protect against falling tubes or tooling).
- Machine Inspection:
- Check for loose fasteners (e.g., on the honing head, fixture) or damaged cables—tighten or replace as needed.
- Verify coolant levels: Ensure the reservoir is filled to the “MIN” mark; check for leaks in hoses or pumps.
- Test emergency stop (“E-STOP”) button: Press it to confirm the machine powers off immediately.
Step 2: Select & Install Honing Stones
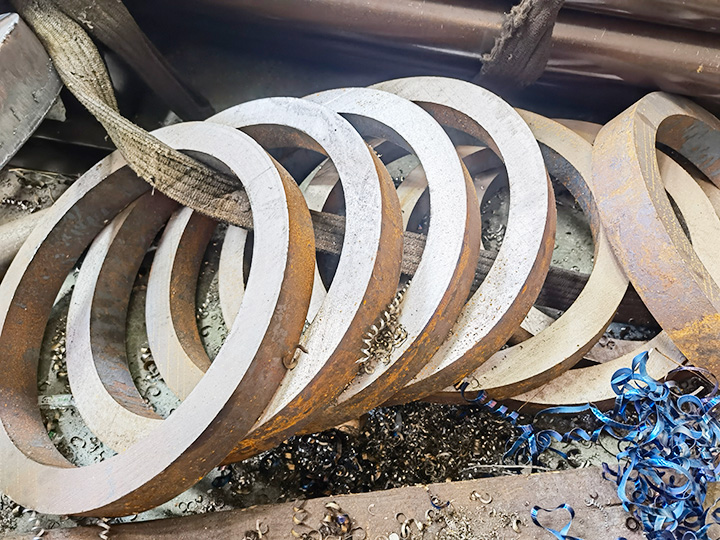
The choice of stones depends on the tube’s material and desired finish. Refer to this guide for common selections:
| Tube Material | Recommended Stone Type | Grit Size (Roughing → Finishing) |
|---------------------|-------------------------------|-----------------------------------|
| Carbon Steel (e.g., AISI 1045) | Aluminum Oxide | 120 → 320 |
| Stainless Steel | Silicon Carbide | 180 → 400 |
| Cast Iron | Ceramic Aluminum Oxide | 100 → 240 |
- Installation:
1. Remove the honing head from the spindle (if not already detached).
2. Insert stones into the head’s stone holders; secure with set screws (avoid over-tightening, which can crack stones).
3. Verify stone alignment: Ensure all stones protrude equally from the head (use a feeler gauge to check uniformity).
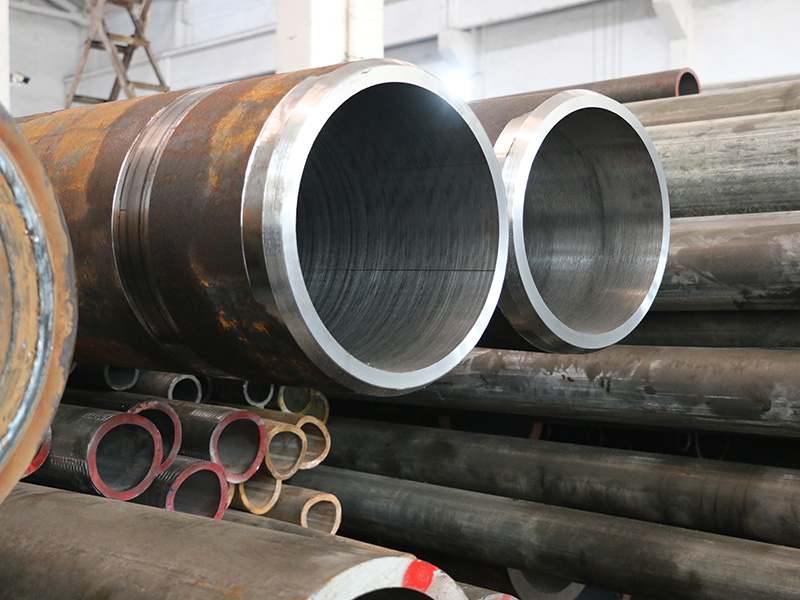
Step 3: Prepare the Tube & Workholding
- Tube Preparation:
1. Clean the tube’s inner/outer surfaces with a solvent (e.g., isopropyl alcohol) to remove oil, rust, or debris—contamination causes uneven honing.
2. Measure the tube’s initial bore diameter (using a micrometer or bore gauge) to calculate required material removal (typically 0.001–0.005 inches for finishing).
- Fixture Setup:
1. Mount the tube in the workholding fixture: Align the tube’s centerline with the honing head’s axis (use a laser alignment tool for precision).
2. Secure the tube: Tighten clamps/pneumatic fixtures enough to prevent movement, but not so tightly that the tube deforms (this causes out-of-roundness).
3. Adjust the fixture height: Ensure the honing head can enter the tube fully without hitting the fixture or tube ends.
Step 4: Configure Machine Parameters
Use the control panel to input settings—start with manufacturer-recommended values for your tube’s specifications, then fine-tune based on test runs:
| Parameter | Typical Range (Adjust by Material/Finish) |
|---------------------|--------------------------------------------|
| Spindle Speed | 500–2,000 RPM (lower for hard materials like stainless steel; higher for soft materials like aluminum) |
| Stroke Rate | 30–100 cycles/min (faster = more uniform finish; slower = deeper material removal) |
| Honing Pressure | 50–200 PSI (lower for finishing; higher for roughing—avoid exceeding 250 PSI, which can damage stones/tube) |
| Process Duration | 2–10 minutes (depends on material removal: 0.001 inch ≈ 2 minutes; 0.005 inch ≈ 8 minutes) |
3. Step-by-Step Honing Operation
Once setup is complete, follow this sequential process to ensure precision and consistency:
Step 1: Initialize the Coolant System
- Turn on the coolant pump (separate switch from the main power).
- Verify coolant flow: Check that fluid sprays evenly onto the honing head and tube bore (adjust nozzle position if needed).
- Confirm coolant temperature: Ideal range is 60–80°F (15–27°C); if overheating, pause to let the system cool (high temperatures reduce stone life).
Step 2: Position the Honing Head
- Use the machine’s manual jog controls to lower/advance the honing head into the tube bore.
- Stop when the head is fully inserted (ensure the stones do not extend beyond the tube’s ends—this causes uneven wear on stone edges).
Step 3: Start the Honing Cycle
- Press the “START” button on the control panel— the spindle will begin rotating, and the stroke mechanism will activate.
- Initial Monitoring (First 30 Seconds):
- Watch for unusual vibrations: These indicate misalignment (stop immediately and recheck the fixture/tube alignment).
- Listen for grinding noises: A smooth, consistent hum is normal; screeching or clicking means stones are binding (reduce pressure or adjust stroke rate).
- Check coolant flow: Ensure chips are being flushed away—clogged nozzles cause surface scratching (pause to clean if needed).
Step 4: Monitor & Adjust Mid-Cycle
- Diameter Checks: Every 1–2 minutes, pause the machine (use “PAUSE” button, not “STOP”) and measure the bore diameter with a bore gauge.
- If diameter is below target: Continue the cycle.
- If diameter is near target: Reduce honing pressure by 20–30% to avoid over-honing (over-honing increases ovality and reduces precision).
- Surface Finish Inspection: For critical applications, use a surface roughness tester (e.g., profilometer) to check Ra (arithmetic mean roughness) values mid-cycle. Aim for:
- Hydraulic cylinder barrels: Ra 0.2–0.8 μm.
- General industrial tubes: Ra 0.8–1.6 μm.
Step 5: Complete the Cycle & Remove the Tube
- When the target diameter and finish are achieved, press “STOP” to halt the spindle and stroke mechanism.
- Turn off the coolant pump.
- Use manual controls to retract the honing head from the tube.
- Loosen the workholding fixture and carefully remove the tube (use gloves to avoid contact with hot coolant or sharp edges).
4. Post-Operation: Cleaning & Maintenance
Proper post-use care extends the machine’s lifespan and ensures consistent performance for future runs:
Step 1: Clean the Machine & Tube
- Machine Cleaning:
- Wipe down the honing head, spindle, and fixture with a lint-free cloth to remove coolant residue and chips.
- Flush the coolant system (monthly, or after 20 hours of use): Drain old fluid, clean the reservoir with a mild detergent, and refill with fresh honing fluid.
- Tube Cleaning:
- Rinse the tube’s bore with solvent to remove remaining coolant and debris.
- Dry the tube with compressed air (avoid high pressure, which can damage the honed surface).
Step 2: Inspect & Maintain Tooling
- Honing Stones:
- Check for wear: If stones are rounded, chipped, or have reduced abrasive grit, replace them (worn stones produce uneven finishes).
- Store unused stones in a dry, cool area (avoid moisture, which causes clumping of abrasive particles).
- Honing Head:
- Lubricate the head’s radial adjustment mechanism (use lithium grease) to ensure smooth stone movement.
- Inspect stone holders for cracks—replace if damaged to prevent stone detachment during operation.
Step 3: Log Maintenance & Process Data
- Record key details in a maintenance log:
- Date, operator name, and tube specifications (material, diameter, length).
- Machine parameters (speed, pressure, duration) and results (final diameter, Ra value).
- Any issues encountered (e.g., vibration, coolant leaks) and solutions implemented.
- This log helps identify trends (e.g., frequent stone replacement for stainless steel) and streamline future setups.
5. Troubleshooting Common Issues
Even with proper setup, issues may arise. Use this troubleshooting guide to resolve them quickly:
| Issue | Possible Cause | Solution |
|--------------------------------|-------------------------------------------------|--------------------------------------------------------------------------|
| Uneven Bore (Ovality > 0.0005”) | Tube misaligned with honing head; uneven clamp pressure. | Re-align tube with laser tool; adjust fixture to apply uniform pressure. |
| Poor Surface Finish (Ra > 1.6 μm) | Worn stones; insufficient coolant flow; too high pressure. | Replace stones; clean coolant nozzles; reduce honing pressure by 20%. |
| Stones Binding in Bore | Over-honing (diameter below target); dull stones. | Stop cycle, measure diameter; replace stones if dull. |
| Coolant Overheating | Clogged coolant filter; low fluid level; ambient temperature > 90°F. | Clean filter; top up coolant; use a fan to cool the reservoir. |
| Spindle Vibration | Loose honing head fasteners; unbalanced tube. | Tighten head screws; balance the tube (add weights to the fixture if needed). |